Set up a smart thermostat: Instructions
Once the Hama heating control panel has been successfully added to the Hama Home app, the next step is to install a smart thermostat for each radiator. This allows you to control each radiator individually depending on room usage and preferences. To connect the thermostats to the heating control system as individually controllable sub-devices, you will find instructions on this page. You can also use the table of contents to jump directly to the point where you need support.
At a glance: Installing a smart thermostat
- Radiator thermostats can be added as sub-devices for smart heating control
- Insert batteries into the thermostat, pair and attach correctly to the radiator
- After the adaptation run, the thermostat has adjusted to the heating and can be added to the Hama Home app
- Step by step through the pairing mode in the app and on the thermostat
- Add further sub-devices and easily expand central heating control
- Each thermostat should be clearly named to avoid confusion
- Advice and help with problems and questions
This page explains how to add radiator thermostats as sub-devices to an existing heating control system. To do this, the control unit itself must already be installed. To install the heating control unit yourself, please use the instructions here:
Smart Home: Adding devices1. Prepare the smart thermostat
First prepare the thermostat itself before installing it on the radiator. To do this, insert the batteries and close the battery compartment cover. The display will then light up and greet you with a brief "Hi". The letters "LA" then appear on the display, they start to flash and then light up constantly. The thermostat can now be installed.
The service life of the batteries in our smart radiator thermostats depends on how often they are used. Under normal operating conditions, you can expect a service life of around 6 to 8 months. As soon as the battery capacity is running low, you will receive a notification in the Hama Home app. You will also see a battery symbol or notice on the thermostat itself. These functions are available in devices from variant V2 onwards and help you to replace the battery in good time. Rechargeable batteries cannot be used.
2. Attaching the thermostat to the radiator
The thermostat replaces the old manual heating controller First unscrew the old control knob. Don't worry, standard valves are usually leak-proof, so the control knob can be removed easily.
Now attach the smart thermostat to the radiator by screwing it onto the valve If necessary, use one of the enclosed adapters that fits your heating system. Useful installation instructions can be found in the operating instructions.
The following adapters are included in the scope of delivery for attaching the smart radiator thermostats Danfoss RAV, Danfoss RA, Giacomini and Caleffi Please note that the Danfoss adapters must be inserted into the union nut with some force before the thread can be screwed on. With the Giacomini adapter, please note that, contrary to the illustration in the operating instructions, the threaded side should face the thermostat.
3. Have it set to radiators
While the letters "LA" are shown on the display, press the dial once and release it again. The display then flashes. This means that the thermostat is performing a short adapter run and adjusting to the heating model. After a short moment, it will either show the preset temperature or the letters "ON", i.e. "switched on".
The "ON" display means that the valve is completely open. As a rule, the display will show "ON" during this step.
4. Set thermostat to pairing mode
To add the thermostat as a sub-device to the Hama Home app, put it into pairing mode. To do this, first turn the dial fully open (direction of rotation: counterclockwise) The letters "OF" will then appear on the display, i.e. briefly for "off " or "switched off". Now press the dial for several seconds until the display changes and 2 horizontal lines or 2x3 dots appear, and then let go.
5. Pairing: Add thermostat to the app
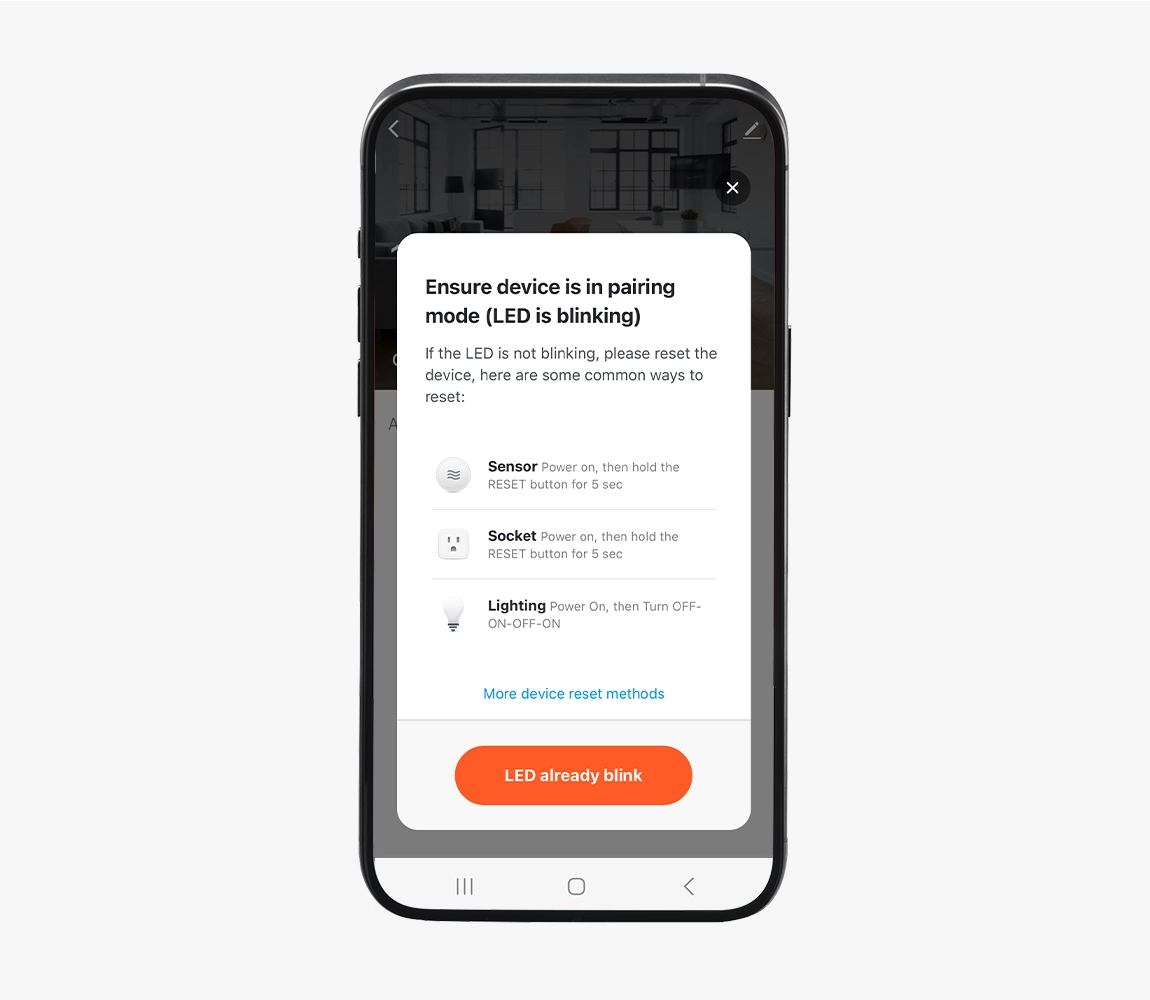
The next step is to open the Hama Home app and tap ‘Hub’ on the home screen.. Now tap on the "Add sub-device" or "Add New Devices" button. The app will now ask you to reset the thermostat or put it into pairing mode. This mode is already active when the horizontal lines or dots can be seen on the display (corresponds to the "LED is already flashing" signal).
As long as the display on the smart thermostat shows the 2 dashes or 2x 3 dots, the device is visible for the app search (pairing mode active). If the display changes or deactivates in the meantime, please reset the device as follows:
- First, remove the thermostat from the Hama Home app if it is still listed. To do this, tap on the pencil icon and select "Remove device".
- Open the battery compartment cover on the thermostat, remove the batteries and reinsert them after a few seconds. Tip: You do not need to unscrew the thermostat to do this. Please use new batteries and close the battery compartment cover again after inserting them.
- Then repeat the steps from point 4: Pairing mode in these instructions.
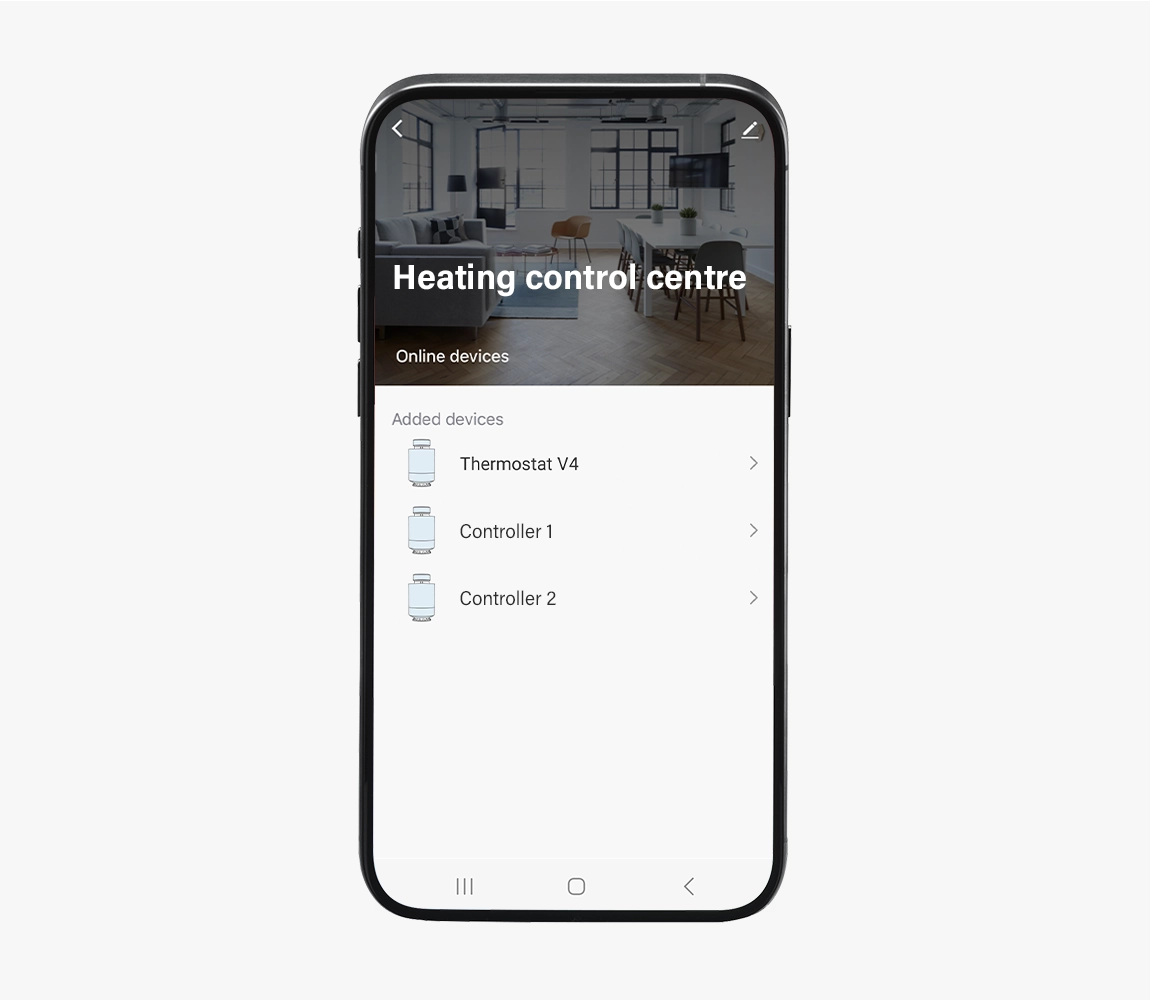
If the thermostat display shows the horizontal lines or dots, you can confirm "LED is already flashing" directly in the app and tap next. This activates the search, the smart thermostat connects to the gateway of the central heating control system and is set up in the Hama Home app (display shows "PA", short for "Pairing"). You can then complete the setup. You can now manage the newly installed thermostat via the home screen and under ‘My Home’ via the heating control centre and rename it if necessary, e.g. ‘Living room radiator left’.
No, smart radiator thermostats can only be added individually to the Hama Home This avoids confusion, both during setup and when managing the thermostats in the app.
6. Set up additional smart thermostats
Depending on how many radiators you want to upgrade with smart thermostats, you can repeat the process as often as you like by adding the thermostats individually. Whether 2, 5 or 10: the choice is yours. Of course, you can also buy individual radiator thermostats again and again if you want to control another heating system smartly.
Make sure that the individual smart radiator thermostats are clearly named in the app It is advisable to use a standardized system, such as room + position, e.g. for "living room heating left" It is important that you know what is meant - and of course there are no limits to your imagination.
You have even more options for simple and intelligent heating control by creating groups and smart scenes.
You can connect up to 10 WLAN radiator thermostats with a single Hama heating control center. If you want to integrate more heating controllers into your system, you have the option of purchasing an additional hub via Hama's technical service In the Hama Home app, there is no limit to the number of gateways you can add, allowing for flexible expansion of your system.
The instructions on this page only work for sub-devices that you want to add to already installed smart home devices. To add other devices such as lamps, sockets or cameras to the Hama Home app, we recommend following the instructions on this page:
Add device to the app